If I have MP4 or MOV video files stored in my S3 storage, can I use ImageKit to forcefully convert these formats to WebM? How long will it take for this conversion to happen and what’s the impact on quality?
If your MP4 or MOV videos are stored in a S3 storage connected to ImageKit as External Storage, ImageKit allows you to forcefully convert them to WebM format using URL-based transformation parameters.
How to Force a Specific Format
By appending the format f-webm parameter to your video’s URL, you can convert and deliver your video in WebM format, regardless of the original format. This is especially useful for optimizing video delivery for platforms that support WebM.
Example: Convert a MOV video to WebM
- Original MOV Video:
https://ik.imagekit.io/ikmedia/docs_images/Community/file_example_MOV_480_700kB.mov
- WebM Output Using ImageKit:
https://ik.imagekit.io/ikmedia/docs_images/Community/file_example_MOV_480_700kB.mov?tr=f-webm
How Long Does the Conversion Take?
When a video transformation is requested, ImageKit first checks its cache to see if the transformed video already exists. If it’s not available, ImageKit processes the video on demand in real time. The time taken to process a video depends on several factors including the original video’s file size, resolution, bitrate, and overall complexity. For example, higher-resolution videos or longer durations will naturally take more time to process.
Since video transformation in ImageKit is asynchronous, the processing starts with the very first request. Read more on how ImageKit processes your Video here.
Given the asynchronous nature of video processing in ImageKit, you should eagerly generate the transformation before using the video URL in a live environment to ensure it works as expected. It guarantees that all necessary transformations are prepared and ready to be served. This avoids unnecessary data transfer costs on your origin. You can listen to video webhook events to get updates on asset transformations.
Monitoring Processing Time for Videos:
- Check server timing header: You can view the actual time taken to process and download a video from the Origin by inspecting the Server-Timing header in the HTTP response sent by ImageKit.
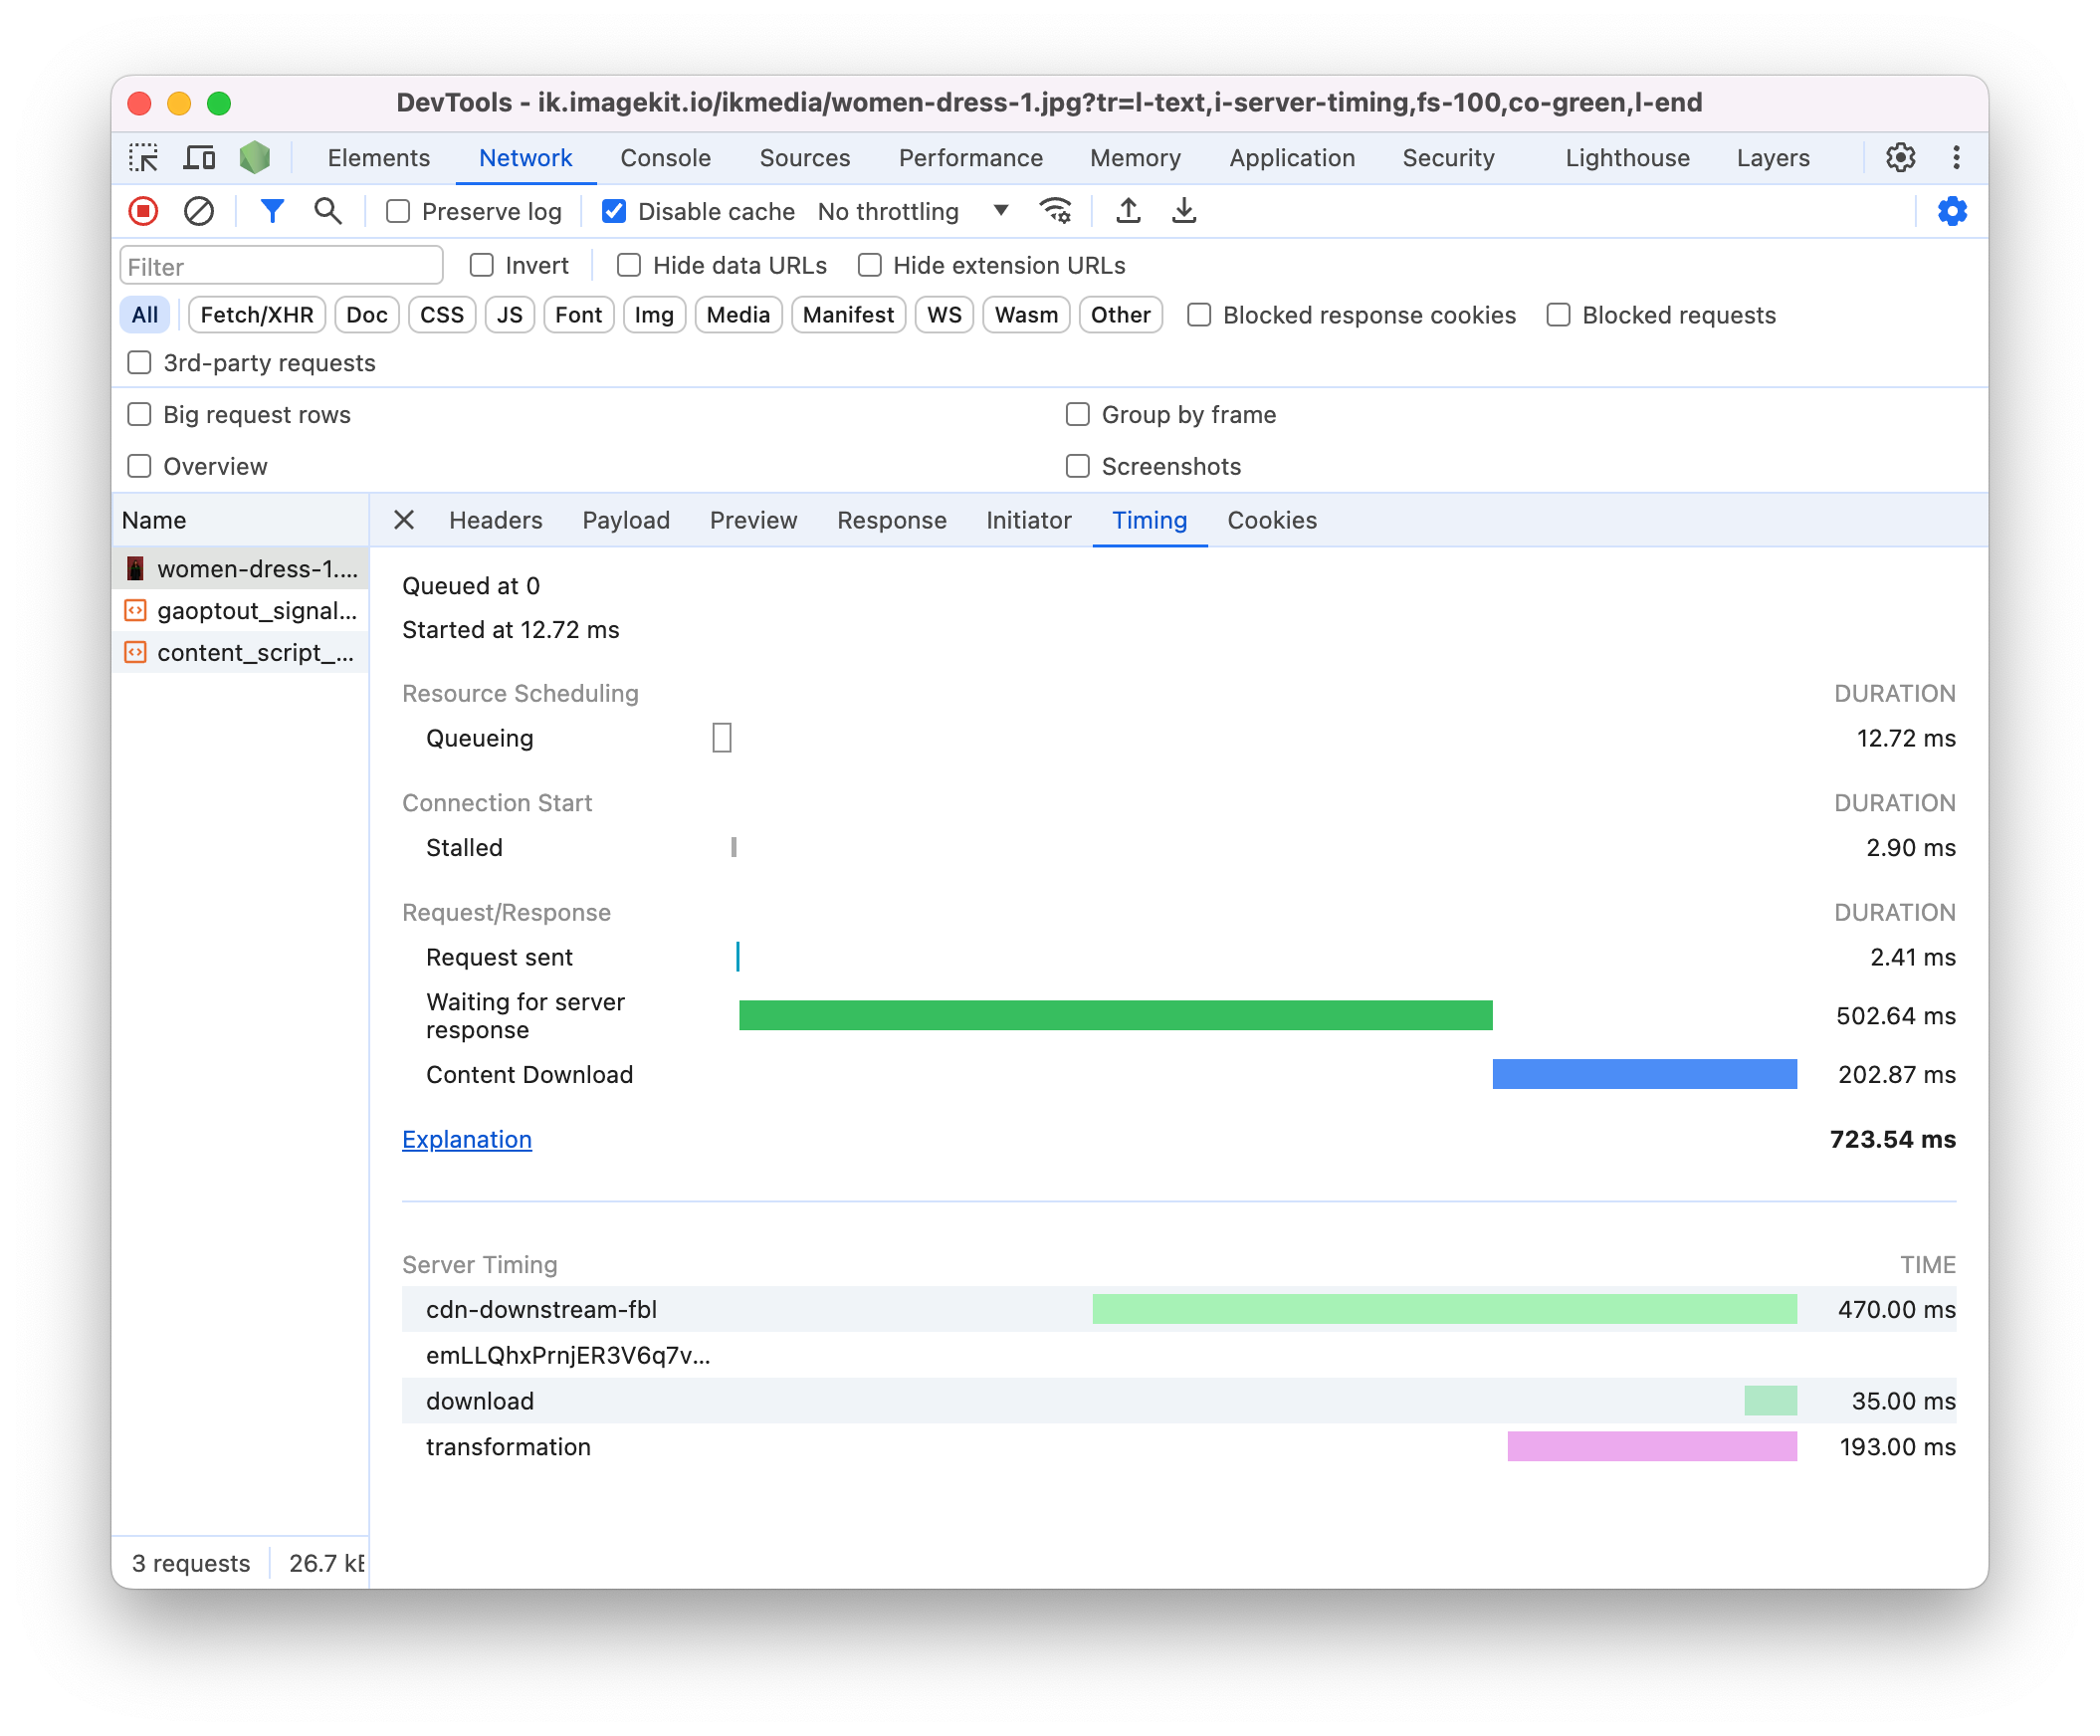
Server-Timing:
transformation;dur=193,download;dur=35,cdn-rid;desc="emLLQhxPrnjER3V6q7vg3a0uB2PeL8WfjQGrDML6SCRXCn1_a5vGGw==",cdn-downstream-fbl;dur=470
Impact on Video Quality
Videos in ImageKit are optimized using lossy compression to reduce file size while maintaining visual quality. By default, the quality is set to 50, offering a good balance between visual clarity and size. Most users won’t notice any visual loss at this level. Increasing the quality above 70 is not recommended, as it can result in videos with significantly larger file sizes and little to no visible improvement in quality.
You can control the degree of compression applied on your videos using:
- The
q(quality) parameter in the URL. - The global “Optimize image quality before delivery” setting in the ImageKit dashboard.